The Natural Path to Thicker Hair: Onion Oil Uncovered

Are you tired of looking at thinning hair in the mirror and wishing for a magic solution? The remedy might not be a high-end chemical treatment, but a humble kitchen staple. Onion hair oil has emerged as a major player in natural hair care, promising to revitalize the scalp and promote denser-looking locks.

This comprehensive guide explores the science, application, and reality of using this botanical remedy to transform your hair routine.

Why Is Everyone Talking About Onion Oil?

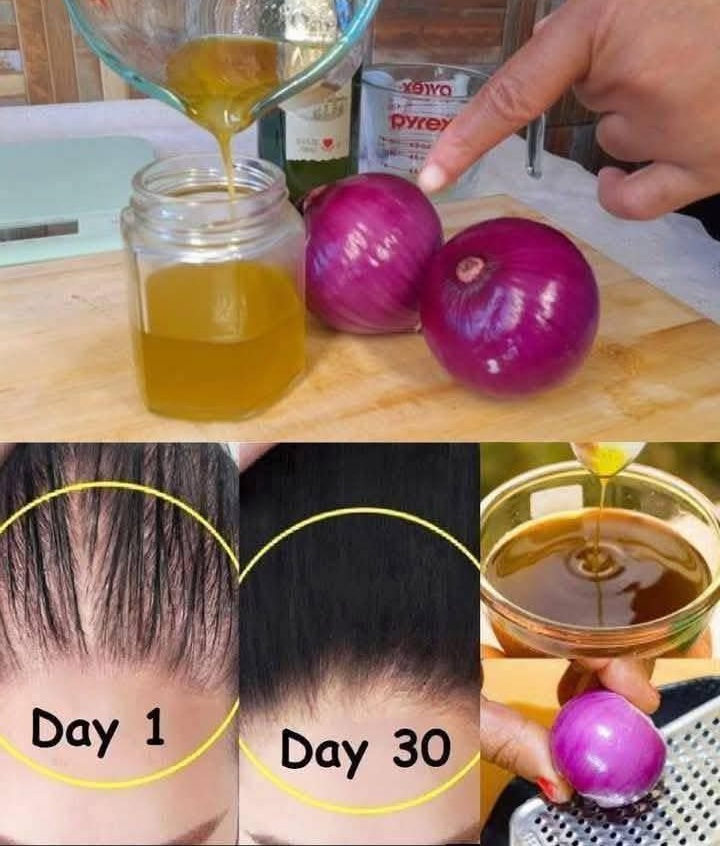
Social media platforms are flooded with dramatic transformation photos showing sparse hairlines turning into thick, lush manes within weeks. While some online claims lean toward exaggeration, the core science behind onion extract for scalp health is surprisingly solid.

Instead of relying on harsh synthetic formulas that can irritate sensitive skin, many people are turning back to traditional, plant-based remedies. Onion oil represents a bridge between ancient holistic practices and modern wellness trends, offering a nutrient-dense approach to hair maintenance.

Củ hành tím có tác dụng gì? | Vinmec

The Nutrient Profile: What Makes Onions Special?

To understand why this pungent vegetable benefits the scalp, we have to look closely at its molecular composition. Onions are not just flavor enhancers; they are packed with bioactive compounds that support tissue health.

1. High Sulfur Content

Sulfur is often referred to as a fundamental building block of hair. Hair strands are primarily made of a tough protein called keratin, which relies on sulfur-rich amino acids (like cysteine) to form strong chemical bonds.

  • Structural Support: Adequate sulfur helps maintain the structural integrity of the hair shaft, reducing structural weaknesses.

  • Resilience: By supporting the protein bonds within each strand, sulfur makes hair less prone to snapping during brushing or styling.

2. Rich in Dietary Antioxidants

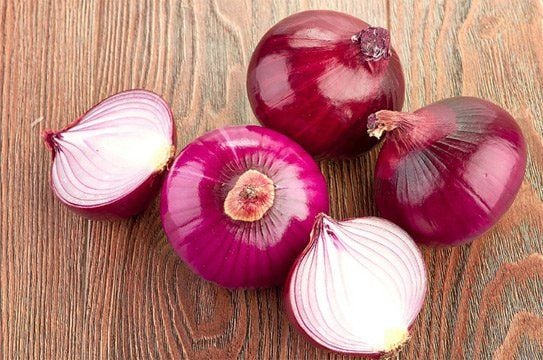
Onions, especially the red and purple varieties, are loaded with flavonoids, particularly quercetin.

  • Environmental Defense: Antioxidants neutralize free radicals generated by pollution, UV rays, and daily stress.

  • Scalp Preservation: By mitigating oxidative stress, these compounds help protect the delicate hair follicles from premature aging and environmental wear.

3. Antimicrobial Properties

The natural compounds in onions exhibit quiet but effective antibacterial and antifungal properties. A healthy hair environment requires a balanced scalp microbiome. By keeping unwanted microbes in check, onion extract helps maintain a clean, comfortable base for your hair to grow.

How Onion Oil Optimizes the Scalp Environment

Hair health is entirely dependent on the condition of the scalp. Think of your scalp as the soil; if the soil is nutrient-poor or stressed, the plants cannot thrive.

Feature How Onion Oil Helps Visible Benefit
Microcirculation Massaging the oil improves localized blood flow. Better delivery of nutrients to the root.
pH Balance Helps maintain an optimal, slightly acidic scalp environment. Less dryness and reduced flaking.
Follicle Nourishment Delivers concentrated vitamins directly to the base of the strand. Hair appears more robust and vibrant.

Enhancing Local Circulation

When you apply onion oil, the physical act of massaging it into the skin plays a massive role in its success. The combination of active onion compounds and mechanical massage encourages blood flow to the surface. This ensures that oxygen and vital nutrients efficiently reach the active base of each hair strand.

DIY vs. Store-Bought: Choosing Your Method

Hành tím khô Ấn Độ - Dori Thơm - 1kg - Hành tím củ to tròn khô – TỎI ĐEN LÝ  SƠN DORI

If you want to introduce this remedy into your routine, you have two main paths: brewing a batch in your kitchen or purchasing a professionally formulated product.

[Option 1: DIY Method] ----> High potency, distinct aroma, short shelf-life
[Option 2: Commercial]  ----> Added botanicals, pleasant scent, stable shelf-life

The Homemade Approach

Making your own blend allows for total control over the ingredients. Typically, people blend fresh red onions to extract the juice, then simmer it gently with a stable base carrier oil like coconut oil, sesame oil, or pure olive oil until the water evaporates, leaving behind an infused treatment.

  • Pros: 100% natural, free from synthetic preservatives, highly cost-effective.

  • Cons: Strong, lingering aroma; requires time to prepare; lacks professional stabilizing agents, meaning it can spoil quickly if water remains in the mixture.

The Commercial Approach

Modern beauty brands have mastered the art of extracting the beneficial elements of onion while neutralizing the intense scent. These formulations often blend onion extract with other celebrated botanicals like rosemary, bhringraj, black seed oil, or amla.

  • Pros: Shelf-stable, travel-friendly, enhanced with pleasant natural fragrances, often lighter in texture.

  • Cons: More expensive; requires careful label-reading to ensure you are avoiding unwanted silicones or artificial heavy dyes.

Step-by-Step Guide: How to Apply Onion Oil Correctly

To get the most out of this natural remedy without causing irritation, follow a deliberate, gentle application method.

Step 1: The Vital Patch Test

Because onion juice is highly concentrated and naturally acidic, it can cause a warming sensation or mild redness on sensitive skin. Always apply a few drops of the oil to the inside of your elbow or a small spot behind your ear. Wait 24 hours to ensure no adverse reactions occur.

Step 2: Section and Warm

Section your hair into manageable parts to expose the scalp clearly. Take a small amount of onion oil and warm it slightly between your palms. Warm oil penetrates the skin surface more efficiently than cold oil.

Step 3: Gentle Massaging

Using the pads of your fingers (never your nails), apply the oil directly to the skin of your scalp. Use circular, rhythmic motions. Focus on areas that feel dry or look sparse, spending at least 5 to 7 minutes massaging the area to boost local circulation.

Step 4: Rest and Rest Intervals

Leave the oil on for a minimum of 30 minutes to a maximum of two hours.

Step 5: Thorough Rinsing

Wash your hair with a gentle, sulfate-free balancing shampoo. You may need to lather twice to completely lift the oil away, ensuring no heavy residue remains to weigh down your hair or clog pores.

Managing the Practicalities: Dealing with the Scent

The biggest hurdle for most people adopting this routine is the unmistakable, pungent aroma of fresh onions. Fortunately, you do not have to walk around smelling like a kitchen.

  • Essential Oil Dilution: If making a DIY batch, add a few drops of high-quality lavender, peppermint, or rosemary essential oil to the final blend. These oils possess excellent scalp-loving properties while masking the sharp onion scent.

  • The Citrus Rinse: After washing the oil out, a final rinse with water containing a splash of fresh lemon juice or a drop of apple cider vinegar can neutralize residual odors beautifully.

  • Frequency Matters: You do not need to use this treatment daily. Utilizing it 1 to 2 times a week is more than enough to reap the rewards without overwhelming your senses or your hair.

Setting Realistic Expectations

It is crucial to look past viral internet marketing and understand what natural remedies can and cannot achieve.

The Timeline of Hair Care

Hair moves through distinct growth phases (Anagen, Catagen, and Telogen). Because of these natural biological cycles, no topical solution can alter the appearance of your hair overnight.

  • Weeks 1–4: The scalp environment begins to balance out. You may notice less dryness, reduced flaking, and a smoother texture at the roots.

  • Weeks 4–8: Hair feels more resilient. Strands become less prone to breaking during routine styling, giving the illusion of a fuller head of hair.

  • Months 3+: With consistent, long-term use alongside a balanced lifestyle, the overall quality and density of your hair look visibly optimized.

When to Seek Professional Guidance

While topical botanical treatments are excellent for general hair maintenance, cosmetic care cannot address deep-seated underlying medical concerns. If you are experiencing sudden, patchy, or severe hair loss, it could stem from internal factors such as hormonal fluctuations, thyroid imbalances, severe nutritional deficiencies, or genetics. In these instances, consulting a certified dermatologist or trichologist is the safest and most effective course of action.

Holistic Habits That Support Hair Vitality

No topical oil works in a vacuum. To maximize the benefits of your onion oil routine, support your body from the inside out with healthy lifestyle choices.

Nutrient-Dense Nutrition

Your hair follicles require a steady supply of vitamins and minerals to construct strong strands. Focus on incorporating a wide variety of whole foods into your daily meals:

  • Lean Proteins: Eggs, fish, poultry, and plant-based legumes provide the amino acids required for keratin production.

  • Iron-Rich Options: Spinach, lentils, and red meat help ensure efficient oxygen transport to your scalp tissues.

  • Healthy Fats: Walnuts, chia seeds, and avocados provide essential fatty acids that keep the scalp moisturized naturally.

Stress Reduction and Hydration

High stress levels trigger the release of hormones that can disrupt the natural cycle of your hair, pushing strands prematurely into the resting phase. Dedicate time to mindfulness, regular movement, and quality sleep. Additionally, drinking plenty of water keeps your scalp hydrated from within, ensuring optimal cellular function.

The Verdict on Onion Hair Oil

Onion hair oil is far more than a passing digital fad. Backed by centuries of traditional use and validated by the presence of strengthening sulfur and protective antioxidants, it offers a practical, accessible path to enhanced hair wellness.

By practicing patience, committing to a consistent weekly routine, and keeping your expectations grounded in biology, you can tap into this potent botanical secret to reveal a more vibrant, healthy-looking mane. Ready to upgrade your routine? Try incorporating a gentle onion oil massage this week and let your scalp experience the difference.

New articles

Secret Tricks for Huge Pepper Harvests Master the Ultimate Soil Hydration Techniques to Keep Your Pepper Plants Vibrantly Green and Packed with Fruits All Season Long Peppers are a favorite in home gardens worldwide. Whether you love fiery habaneros, sweet bell peppers, or classic cayenne varieties, watching these plants thrive is incredibly rewarding. However, many backyard growers hit a frustrating wall: their plants stop growing, the leaves lose their rich green color, and the blossoms drop off before producing a single pod.  A common misconception is that regular tap water is always enough to sustain these heavy feeders. While clean moisture is the foundation of plant life, relying solely on basic, untreated hydration can sometimes lead to nutrient leaching, mineral deficiencies, and lackluster yields. To unlock the full potential of your garden, you need to elevate your hydration routine.  This ultimate guide breaks down five advanced, natural hydration methods to supercharge your pepper patch, maximize your harvest, and prevent common growing issues.  Understanding the Needs of Your Pepper Plants Before changing your routine, it is essential to understand why peppers behave the way they do. These plants belong to the Solanaceae family, making them close relatives of tomatoes and eggplants. They have specific environmental preferences that dictate how they absorb moisture and nutrients.  The Problem with Yellowing Leaves When foliage turns pale or yellow, it is rarely a sign of thirst alone. In fact, it is usually a cry for help regarding nutrient uptake or root stress.  Nutrient Leaching: Excessive, unmonitored watering can wash vital mobile nutrients—like nitrogen—deep into the ground, far out of reach of the plant’s root system.  Root Suffocation: Over-saturated soil lacks oxygen. Without oxygen, roots begin to decay, preventing them from drawing up the food the plant needs to stay green.  pH Imbalance: If your local water source is highly alkaline or treated with heavy minerals, it can alter the soil chemistry, locking away essential micronutrients like iron and magnesium.  Why Standard Watering Sometimes Falls Short Pure water provides hydration, but it does not replace the minerals that growing plants continuously pull from the earth. Think of your plants as high-performance athletes; they need more than just moisture to sustain peak performance during their reproductive phase. By infusing your watering schedule with organic, nutrient-dense solutions, you feed the soil biology and the plant simultaneously.  5 Advanced Hydration Methods for Peak Yields To achieve a bounty like the one pictured above, consider integrating these five proven strategies into your gardening routine.  +————————————+————————————+ | Hydration Method                   | Primary Benefit                    | +————————————+————————————+ | 1. Fermented Organic Tea           | Rapid nitrogen and microbial boost | | 2. Calcium-Infused Steeps          | Prevents blossom-end rot           | | 3. Epsom Mineral Hydration         | Enhances chlorophyll production    | | 4. Ephemeral Starch Water          | Feeds beneficial soil microbes     | | 5. Deep-Root Trickle System        | Encourages resilient root growth   | +————————————+————————————+ 1. Fermented Organic Tea (Compost & Weed Brews) Instead of relying on synthetic chemical additives that can damage soil health over time, look to natural fermentation. Making a liquid extract from well-aged compost or specific nutrient-rich plants (like stinging nettle or comfrey) creates a powerhouse drink for your garden.  How it works: The fermentation process extracts soluble nutrients and populates the liquid with millions of beneficial microbes. When applied to the base of your plants, it delivers an immediate dose of easily absorbable nitrogen and trace minerals.  Application: Steep one part mature compost or shredded green matter in four parts rainwater for 5 to 7 days, stirring daily. Strain the mixture, dilute it until it resembles weak tea, and use it to drench the soil once every two weeks.  2. Calcium-Infused Steeps (Eggshell Extract) Peppers have a massive demand for calcium, especially as they transition from structural growth to fruit production. A lack of calcium leads to a devastating condition where the bottoms of the pods turn black, velvety, and rotten.  How it works: While crushing raw eggshells into the soil takes months or years to break down, creating an accelerated liquid extract makes the calcium bioavailable much faster.  Application: Wash and thoroughly dry used eggshells. Toast them lightly in a pan to break down organic proteins, then crush them into a fine powder. Steep this powder in water with a splash of organic apple cider vinegar for a few days to neutralize and release the calcium. Dilute this solution heavily with fresh rainwater before pouring it around the root zone.  3. Epsom Mineral Hydration (Magnesium Boost) Magnesium is the central atom in the chlorophyll molecule, which gives leaves their rich, dark green color and powers photosynthesis. If your pepper leaves are turning yellow while the veins stay green, a magnesium deficiency is the likely culprit.  How it works: Naturally occurring magnesium sulfate dissolves completely in water, allowing the plant to absorb it instantly through either the roots or the pores of the leaves.  Application: Dissolve one tablespoon of technical-grade magnesium sulfate crystals into a gallon of lukewarm water. Use this solution as a gentle mist on the foliage early in the morning, or pour it directly onto the soil at the start of the flowering stage to encourage robust budding.  4. Ephemeral Starch Water (Kitchen Byproducts) Sustainability starts at home. The water you use to prepare daily meals is often packed with valuable nutrients that usually go right down the drain. Water used to boil vegetables, rice, or pasta is an excellent resource for your garden.  How it works: Unsalted cooking water retains starches and micro-elements released from food. When introduced to your garden beds, these starches act as a food source for the native soil bacteria, promoting a thriving ecosystem that unlocks existing ground nutrients.  Application: Always ensure the cooking water is completely free of salt, oils, or seasonings. Allow the liquid to cool down entirely to room temperature. Pour it directly onto your garden beds the same day it is created to prevent fermentation or unwanted odors in your home.  5. Deep-Root Trickle System (Targeted Hydration) How you deliver moisture is just as critical as what is inside it. Overhead watering wets the foliage, which invites fungal issues, leaves the lower roots dry, and wastes water through evaporation.  How it works: Shifting to a slow, targeted delivery system ensures that moisture penetrates deep into the earth. This encourages the root system to grow downward, making the plant incredibly resilient against hot summer dry spells.  Application: Utilize a drip irrigation line, a porous soaker hose, or a DIY inverted plastic bottle system buried next to the plant stem. Deliver moisture slowly over an extended period rather than giving a quick, superficial splash. This keeps the root zone consistently damp without ever becoming waterlogged.  Pro-Tips for Long-Term Gardening Success To get the most out of your advanced watering routine, combine these techniques with sound structural gardening practices:  Always Mulch Your Beds: Lay down a 2-inch layer of organic mulch, such as clean straw, shredded leaves, or wood chips. Mulch regulates soil temperature, prevents moisture from evaporating rapidly, and stops soil-borne pathogens from splashing up onto lower leaves.  Monitor Soil Moisture Manually: Before applying any specialized liquid mixtures, insert your index finger two inches into the dirt. If it feels wet, hold off on watering for another day. Peppers prefer a cycle where the soil dries out slightly between hydration sessions.  Water at the Right Time: Aim to water early in the morning. This allows any accidental splashes on the foliage to dry rapidly under the sun, minimizing the risk of powdery mildew, blight, and fungal leaf spots.  By stepping away from a basic hydration routine and utilizing these nutrient-dense methods, your pepper plants will reward you with rich, dark green foliage and a continuous, heavy harvest of bright, beautiful fruits. Happy gardening!

Secret Tricks for Huge Pepper Harvests Master the Ultimate Soil Hydration Techniques to Keep Your Pepper Plants Vibrantly Green and Packed with Fruits All Season Long Peppers are a favorite in home gardens worldwide. Whether you love fiery habaneros, sweet bell peppers, or classic cayenne varieties, watching these plants thrive is incredibly rewarding. However, many backyard growers hit a frustrating wall: their plants stop growing, the leaves lose their rich green color, and the blossoms drop off before producing a single pod. A common misconception is that regular tap water is always enough to sustain these heavy feeders. While clean moisture is the foundation of plant life, relying solely on basic, untreated hydration can sometimes lead to nutrient leaching, mineral deficiencies, and lackluster yields. To unlock the full potential of your garden, you need to elevate your hydration routine. This ultimate guide breaks down five advanced, natural hydration methods to supercharge your pepper patch, maximize your harvest, and prevent common growing issues. Understanding the Needs of Your Pepper Plants Before changing your routine, it is essential to understand why peppers behave the way they do. These plants belong to the Solanaceae family, making them close relatives of tomatoes and eggplants. They have specific environmental preferences that dictate how they absorb moisture and nutrients. The Problem with Yellowing Leaves When foliage turns pale or yellow, it is rarely a sign of thirst alone. In fact, it is usually a cry for help regarding nutrient uptake or root stress. Nutrient Leaching: Excessive, unmonitored watering can wash vital mobile nutrients—like nitrogen—deep into the ground, far out of reach of the plant’s root system. Root Suffocation: Over-saturated soil lacks oxygen. Without oxygen, roots begin to decay, preventing them from drawing up the food the plant needs to stay green. pH Imbalance: If your local water source is highly alkaline or treated with heavy minerals, it can alter the soil chemistry, locking away essential micronutrients like iron and magnesium. Why Standard Watering Sometimes Falls Short Pure water provides hydration, but it does not replace the minerals that growing plants continuously pull from the earth. Think of your plants as high-performance athletes; they need more than just moisture to sustain peak performance during their reproductive phase. By infusing your watering schedule with organic, nutrient-dense solutions, you feed the soil biology and the plant simultaneously. 5 Advanced Hydration Methods for Peak Yields To achieve a bounty like the one pictured above, consider integrating these five proven strategies into your gardening routine. +————————————+————————————+ | Hydration Method | Primary Benefit | +————————————+————————————+ | 1. Fermented Organic Tea | Rapid nitrogen and microbial boost | | 2. Calcium-Infused Steeps | Prevents blossom-end rot | | 3. Epsom Mineral Hydration | Enhances chlorophyll production | | 4. Ephemeral Starch Water | Feeds beneficial soil microbes | | 5. Deep-Root Trickle System | Encourages resilient root growth | +————————————+————————————+ 1. Fermented Organic Tea (Compost & Weed Brews) Instead of relying on synthetic chemical additives that can damage soil health over time, look to natural fermentation. Making a liquid extract from well-aged compost or specific nutrient-rich plants (like stinging nettle or comfrey) creates a powerhouse drink for your garden. How it works: The fermentation process extracts soluble nutrients and populates the liquid with millions of beneficial microbes. When applied to the base of your plants, it delivers an immediate dose of easily absorbable nitrogen and trace minerals. Application: Steep one part mature compost or shredded green matter in four parts rainwater for 5 to 7 days, stirring daily. Strain the mixture, dilute it until it resembles weak tea, and use it to drench the soil once every two weeks. 2. Calcium-Infused Steeps (Eggshell Extract) Peppers have a massive demand for calcium, especially as they transition from structural growth to fruit production. A lack of calcium leads to a devastating condition where the bottoms of the pods turn black, velvety, and rotten. How it works: While crushing raw eggshells into the soil takes months or years to break down, creating an accelerated liquid extract makes the calcium bioavailable much faster. Application: Wash and thoroughly dry used eggshells. Toast them lightly in a pan to break down organic proteins, then crush them into a fine powder. Steep this powder in water with a splash of organic apple cider vinegar for a few days to neutralize and release the calcium. Dilute this solution heavily with fresh rainwater before pouring it around the root zone. 3. Epsom Mineral Hydration (Magnesium Boost) Magnesium is the central atom in the chlorophyll molecule, which gives leaves their rich, dark green color and powers photosynthesis. If your pepper leaves are turning yellow while the veins stay green, a magnesium deficiency is the likely culprit. How it works: Naturally occurring magnesium sulfate dissolves completely in water, allowing the plant to absorb it instantly through either the roots or the pores of the leaves. Application: Dissolve one tablespoon of technical-grade magnesium sulfate crystals into a gallon of lukewarm water. Use this solution as a gentle mist on the foliage early in the morning, or pour it directly onto the soil at the start of the flowering stage to encourage robust budding. 4. Ephemeral Starch Water (Kitchen Byproducts) Sustainability starts at home. The water you use to prepare daily meals is often packed with valuable nutrients that usually go right down the drain. Water used to boil vegetables, rice, or pasta is an excellent resource for your garden. How it works: Unsalted cooking water retains starches and micro-elements released from food. When introduced to your garden beds, these starches act as a food source for the native soil bacteria, promoting a thriving ecosystem that unlocks existing ground nutrients. Application: Always ensure the cooking water is completely free of salt, oils, or seasonings. Allow the liquid to cool down entirely to room temperature. Pour it directly onto your garden beds the same day it is created to prevent fermentation or unwanted odors in your home. 5. Deep-Root Trickle System (Targeted Hydration) How you deliver moisture is just as critical as what is inside it. Overhead watering wets the foliage, which invites fungal issues, leaves the lower roots dry, and wastes water through evaporation. How it works: Shifting to a slow, targeted delivery system ensures that moisture penetrates deep into the earth. This encourages the root system to grow downward, making the plant incredibly resilient against hot summer dry spells. Application: Utilize a drip irrigation line, a porous soaker hose, or a DIY inverted plastic bottle system buried next to the plant stem. Deliver moisture slowly over an extended period rather than giving a quick, superficial splash. This keeps the root zone consistently damp without ever becoming waterlogged. Pro-Tips for Long-Term Gardening Success To get the most out of your advanced watering routine, combine these techniques with sound structural gardening practices: Always Mulch Your Beds: Lay down a 2-inch layer of organic mulch, such as clean straw, shredded leaves, or wood chips. Mulch regulates soil temperature, prevents moisture from evaporating rapidly, and stops soil-borne pathogens from splashing up onto lower leaves. Monitor Soil Moisture Manually: Before applying any specialized liquid mixtures, insert your index finger two inches into the dirt. If it feels wet, hold off on watering for another day. Peppers prefer a cycle where the soil dries out slightly between hydration sessions. Water at the Right Time: Aim to water early in the morning. This allows any accidental splashes on the foliage to dry rapidly under the sun, minimizing the risk of powdery mildew, blight, and fungal leaf spots. By stepping away from a basic hydration routine and utilizing these nutrient-dense methods, your pepper plants will reward you with rich, dark green foliage and a continuous, heavy harvest of bright, beautiful fruits. Happy gardening!

Master the Ultimate Soil Hydration Techniques to Keep Your Pepper Plants Vibrantly Green and Packed with Fruits All Season Long…

23/05/2026 16:44